Last Updated on August 30, 2024 by Admin
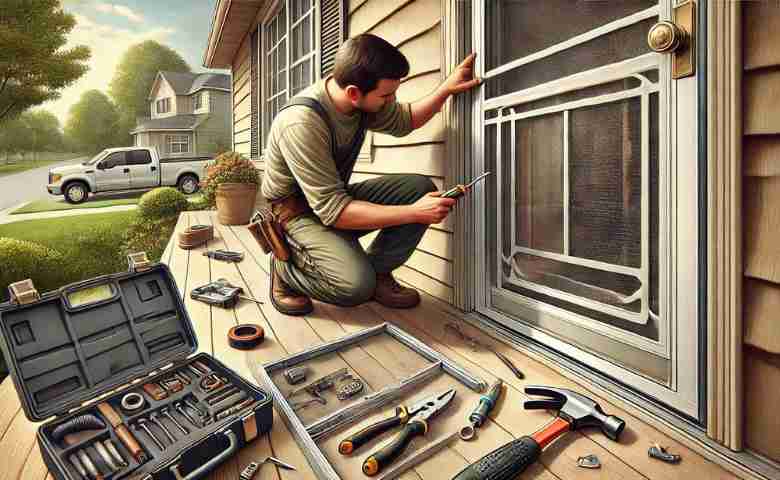
Regarding home maintenance, the front door often gets all the attention. However, storm doors protect your main entry door and improve your home’s energy efficiency. If your storm door is damaged or malfunctioning, it must be addressed quickly to prevent further problems. In this comprehensive guide, we will walk you through storm door repair, covering everything from diagnosing common issues to step-by-step instructions on how to fix them. Whether you’re an experienced DIYer or a beginner, this guide is tailored to help US homeowners get their storm doors back in top shape.
ConstructionCareerHub App is LIVE — built ONLY for construction careers. Don’t apply with a weak resume.
Get ATS-ready Resume Lab + Interview Copilot + Campus Placement Prep (resume screening, skill gaps, interview readiness) — in minutes & Other advanced features.
Explore Smarter Construction Career Tools →Quick check. Big impact. Start now.
Table of Contents
Why Storm Door Repair is Important
Protection from the Elements
Storm doors serve as the first line of defense against harsh weather conditions. They shield your main door from rain, snow, and wind, preventing damage and prolonging the life of your entry door. Over time, exposure to the elements can cause wear and tear on your storm door, leading to repair issues.
Enhanced Energy Efficiency
A well-maintained storm door can significantly improve your home’s energy efficiency. It provides an additional layer of insulation, helping to keep your home warm in the winter and cool in the summer. Repairing a storm door that isn’t functioning correctly can help reduce energy bills and create a more comfortable living environment.
Security
Storm doors also add an extra layer of security to your home. A damaged or faulty storm door can compromise your home’s safety, making it easier for intruders to gain access. Repairing storm doors promptly is essential to maintaining your home’s security.
Common Storm Door Issues
Before diving into the repair process, it’s crucial to identify the specific problem with your storm door. Here are some of the most common issues homeowners encounter:
1. Broken or Worn-Out Hardware
The hardware on your storm door, such as handles, hinges, and closers, can wear out over time. Broken handles or loose hinges can make the door difficult to operate and reduce its effectiveness.
2. Damaged or Torn Screens
Storm doors with screens are susceptible to tears and damage, especially if you have pets or small children. A torn screen looks unsightly and allows insects and debris to enter your home.
ChatGPT said:
3. Warped or Misaligned Door Frame
Over time, the frame of your storm door may warp or become misaligned due to weather exposure or improper installation. This can cause the door to stick, not close properly, or leave gaps that let in drafts and pests.
4. Faulty or Broken Glass Panels
Many storm doors feature glass panels that provide insulation and protection. If the glass is cracked, shattered, or fogged, it diminishes the door’s effectiveness and can pose a safety hazard.
5. Worn Weatherstripping
The weatherstripping on your storm door helps to seal the gaps around the door, preventing drafts and improving energy efficiency. If the weatherstripping is worn or missing, your storm door will not provide adequate insulation.
6. Sagging or Misaligned Door
A storm door that sags or is misaligned can be difficult to open and close, potentially causing further damage to the door or the frame. This issue often results from loose hinges, a warped frame, or improper installation.
DIY Storm Door Repair: Step-by-Step Guide
If you’re experiencing any of the above issues, repairing a storm door can often be a straightforward DIY project. Below are step-by-step instructions to help you tackle common storm door repairs.
1. Repairing or Replacing Storm Door Hardware
Tools and Materials Needed:
- Screwdriver (Phillips and flathead)
- Replacement hardware (handle, hinges, closer, etc.)
- Lubricating oil (for hinges)
Steps:
- Identify the Problem: Check all the hardware on your storm door to identify any broken or worn-out parts. This includes the handle, hinges, and closer.
- Remove the Damaged Hardware: Using the appropriate screwdriver, carefully remove the screws holding the damaged hardware in place.
- Install New Hardware: Align the new hardware with the existing holes in the door and secure it with screws. If you’re replacing hinges, make sure the door is properly aligned before tightening the screws completely.
- Lubricate Moving Parts: Apply lubricating oil to the hinges and other moving parts to ensure smooth operation.
2. Repairing a Torn Screen
Tools and Materials Needed:
- Replacement screen material
- Screen spline
- Spline roller
- Utility knife
- Screwdriver
Steps:
- Remove the Damaged Screen: Carefully remove the screen frame from the door, if possible. Using a screwdriver, pry out the old spline (the rubber strip holding the screen in place) and remove the damaged screen.
- Cut the New Screen: Lay the replacement screen material over the frame and cut it to size, leaving a few inches of excess around the edges.
- Install the New Screen: Place the new screen over the frame and press the spline into the groove, securing the screen in place. Use the spline roller to ensure the spline is fully seated and the screen is taut.
- Trim Excess Screen: Using a utility knife, carefully trim any excess screen material from around the edges of the frame.
- Reinstall the Screen Frame: Once the new screen is securely in place, reattach the frame to the storm door.
3. Fixing a Warped or Misaligned Door Frame
Tools and Materials Needed:
- Level
- Shims
- Screwdriver
- Wood screws (if needed)
- Carpenter’s square
Steps:
- Check the Alignment: Use a level and a carpenter’s square to check the alignment of the door frame. Look for areas where the frame is out of square or the door is not sitting properly.
- Adjust the Hinges: If the door is misaligned, the hinges may need adjustment. Loosen the screws on the hinges slightly and reposition the door until it is level. Tighten the screws to secure the door in place.
- Add Shims if Necessary: If the frame itself is warped, you may need to add shims between the frame and the door jamb to bring it back into alignment. Insert shims where needed and secure them with screws.
- Test the Door: Open and close the door several times to ensure it operates smoothly and is properly aligned.
4. Replacing Broken Glass Panels
Tools and Materials Needed:
- Replacement glass panel
- Glazing points or clips
- Glazing putty or sealant
- Putty knife
- Safety gloves and goggles
Steps:
- Remove the Broken Glass: Carefully remove the broken glass panel, wearing safety gloves and goggles to protect yourself from sharp edges. Remove any remaining glazing points or clips and clean the area.
- Install the New Glass: Place the replacement glass panel into the frame, securing it with new glazing points or clips.
- Seal the Edges: Apply glazing putty or sealant around the edges of the glass to secure it in place and prevent drafts.
- Allow to Cure: Let the sealant or putty cure according to the manufacturer’s instructions before using the door.
5. Replacing Worn Weatherstripping
Tools and Materials Needed:
- Replacement weatherstripping
- Scissors or utility knife
- Adhesive (if needed)
Steps:
- Remove Old Weatherstripping: Carefully remove the old weatherstripping from around the door frame, taking care not to damage the surface.
- Measure and Cut New Weatherstripping: Measure the length of the door frame and cut the new weatherstripping to fit.
- Install New Weatherstripping: If the new weatherstripping is self-adhesive, simply peel off the backing and press it into place around the door frame. If not, use an appropriate adhesive to secure it.
- Test the Seal: Close the door to ensure the new weatherstripping creates a tight seal without hindering the door’s operation.
6. Fixing a Sagging or Misaligned Door
Tools and Materials Needed:
- Screwdriver
- Level
- Shims (if needed)
Steps:
- Check the Door Alignment: Use a level to check if the door is sagging or misaligned.
- Tighten the Hinges: Often, a sagging door is due to loose hinges. Tighten all hinge screws to see if this corrects the issue.
- Add Shims: If the door is still sagging, place shims behind the hinges to realign the door. Secure the shims in place with screws.
- Test the Door: Open and close the door to ensure it operates smoothly and does not sag.
When to Call a Professional for Storm Door Repair
While many storm door repairs can be done on your own, some situations may require the expertise of a professional. If your storm door is severely damaged, if the frame is significantly warped, or if you’re uncomfortable performing the repairs yourself, it’s best to call a professional.
Signs You Need Professional Help:
- The door frame is severely warped or damaged.
- The glass panels are cracked or shattered beyond repair.
- You lack the tools or experience to safely complete the repair.
- The door is custom-made and requires specialized parts.
Tips for Maintaining Your Storm Door
Regular maintenance can help extend the life of your storm door and prevent costly repairs. Here are some tips to keep your storm door in top condition:
1. Regular Cleaning
Clean your storm door regularly to prevent dirt and debris from accumulating. Use mild soap and water to clean the glass panels, screens, and frame.
2. Lubricate Moving Parts
Apply lubricating oil to the hinges, handles, and closers to keep them operating smoothly. Do this at least once a year, or more frequently if you notice the door becoming difficult to open or close.
3. Inspect for Damage
Periodically inspect your storm door for signs of damage, such as loose hardware, torn screens, or worn weatherstripping. Address any issues promptly to prevent them from worsening.
4. Reapply Weatherstripping
Weatherstripping can wear out over time, reducing its effectiveness. Check the weatherstripping annually and replace it as needed to maintain a proper seal.
5. Adjust the Door Alignment
Over time, your storm door may become misaligned due to settling or changes in weather conditions. Check the door alignment regularly and make adjustments as needed to ensure it operates smoothly.
Keeping Your Storm Door in Top Shape
Storm door repair is an essential aspect of home maintenance that can improve your home’s energy efficiency, security, and curb appeal. Whether you’re dealing with minor issues like a torn screen or more significant problems like a misaligned door frame, this guide provides you with the knowledge and tools to tackle the repair yourself. Remember, regular maintenance can prevent many common storm door issues, saving you time and money in the long run.
If you encounter problems beyond your skill level, don’t hesitate to contact a professional. By keeping your storm door in good repair, you’ll ensure it continues to protect your home from the elements and enhance its overall functionality.
Related Posts: